Sunday, 22 January 2012

Paper Making


This week in science we have been learning about renewable and non-renewable resources and recycling. We decided to have a go at recycling some of our old drawings into new paper. Luckily I had picked up a paper making kit in a yard sale a while back. Just in case you are wondering about the eye make-up we were still being Egyptians today.

First step was to rip up lots of paper and soak it overnight in water. Then we blended small amounts at a time in the kitchen blender (food and art preparation overlaps a lot in this house!). Water and slushy paper got splatted pretty much everywhere.

A disgusting paper pulp.

We took the next stage outside. First we put some pulp and more water in a large container. Then we assembled the mould, net and deckle on top of each other.


Assembling the paper making frame

Next we lowered the frame into the pulp mixture and caught up some pulp on the top. We let some of the water drain back into the tub.

Lowering the frame into the pulp

Letting water drain out

Lifting out some paper

Letting it drain


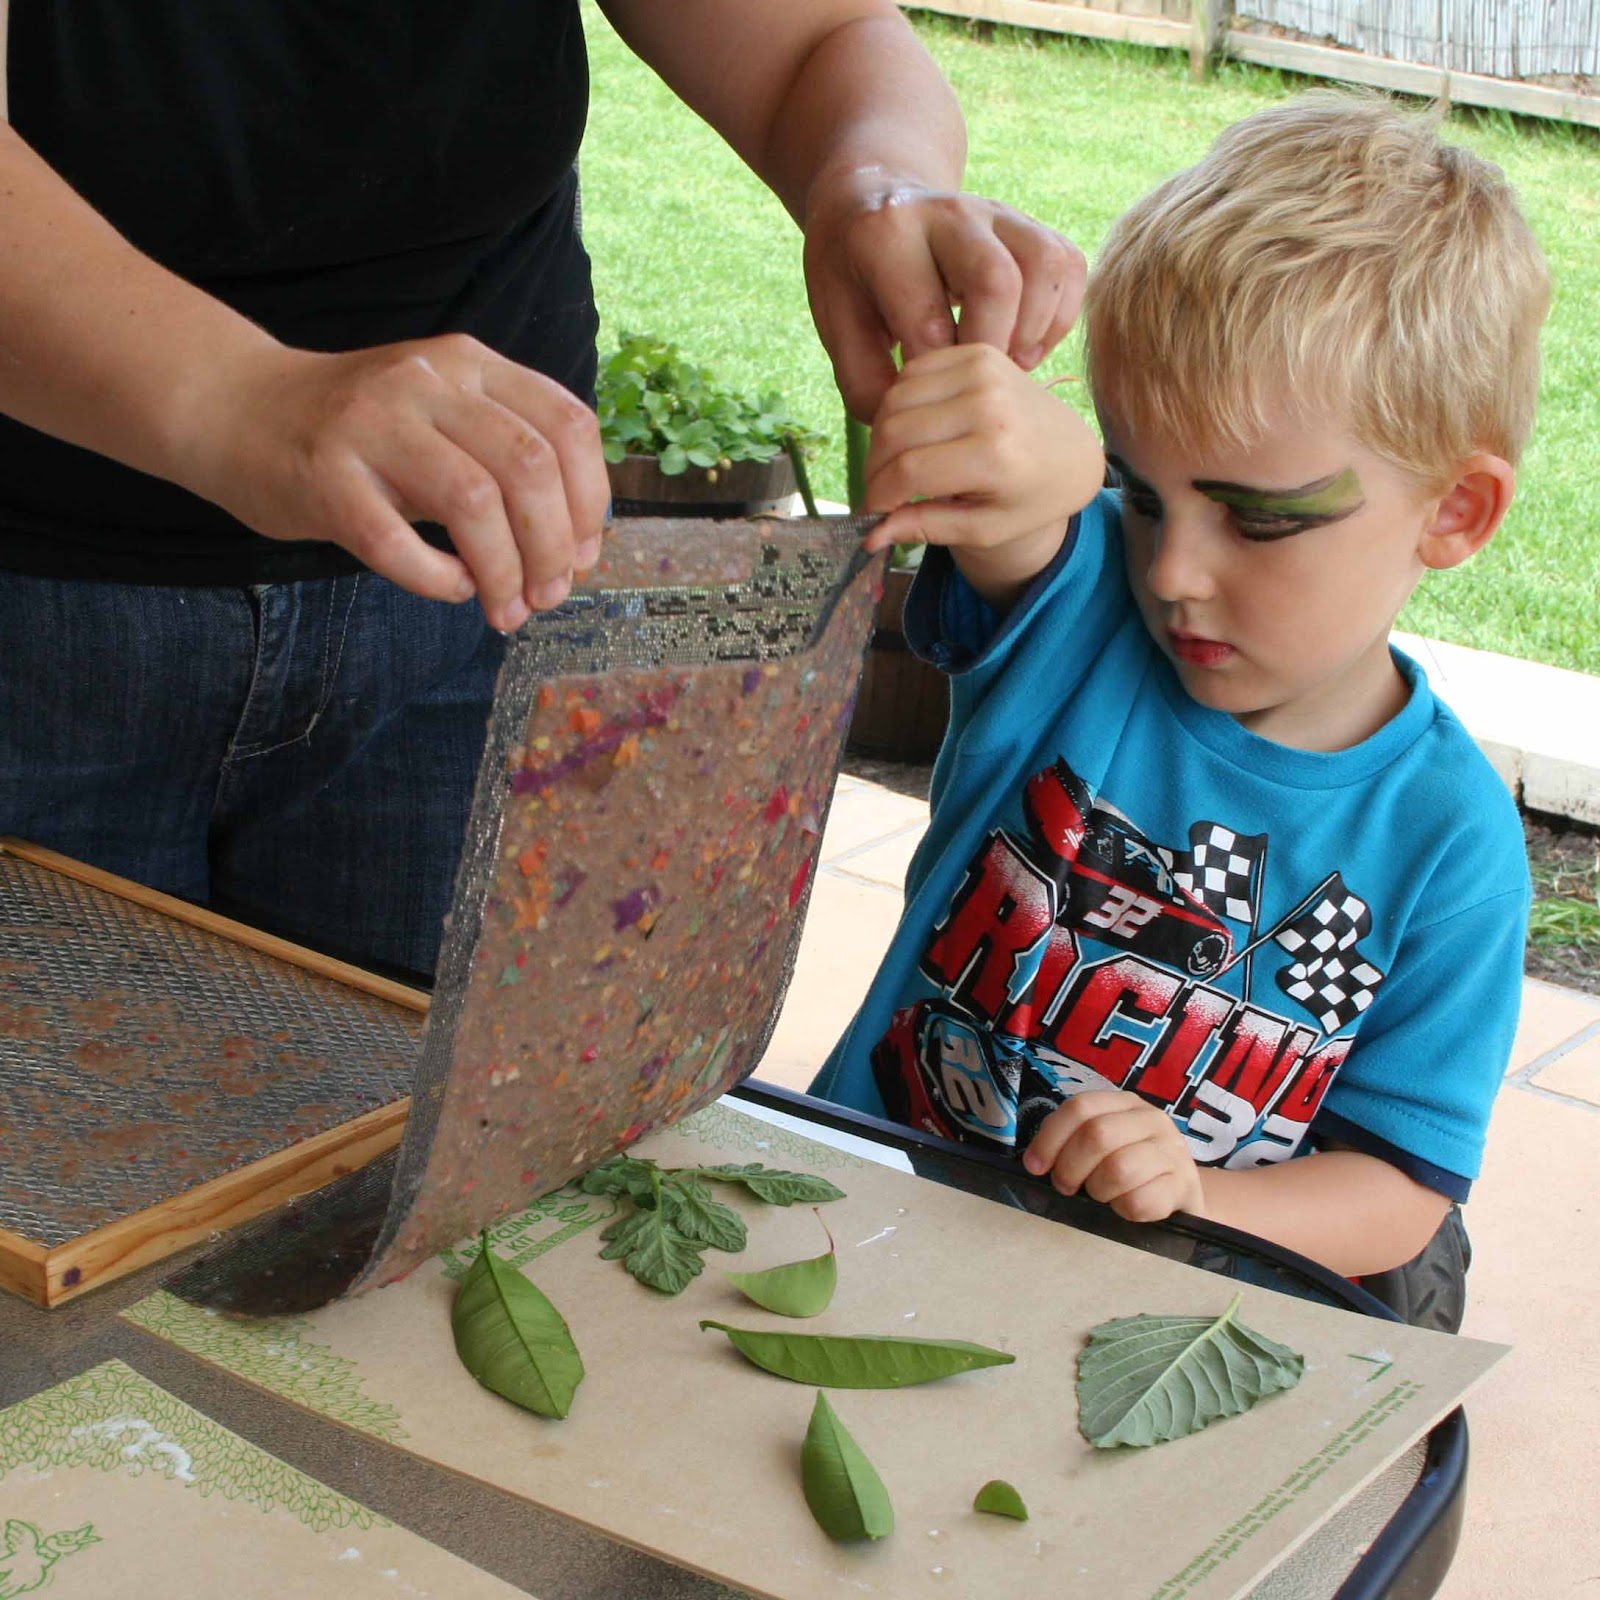
The next job was to remove the deckle, lift up the paper on the net, and turn it onto a drying board.

Removing the deckle

We tried putting some leaves and shells on some of the drying boards to give out paper some texture.


Adding leaves to make an imprint


Placing the paper and net onto the drying board.

Next we used a sponge over the net to soak up the excess water and then we removed the net.

Soaking up excess water


L's first piece of paper ready to dry.

We left the boards and paper to dry in the sun. Then it was a simple matter of flexing the boards to loosen the paper and peeling it off.

Here are the results:

Finished papers some textured, some plain

A sheet of paper with leaf imprints

I'm not sure what we are going to do with the paper yet, but I'll think of something.

Saturday, 21 January 2012

Walk Like Egyptians


In our history lessons this week we have been learning about early Egypt. We found out about the Upper and Lower Egyptian kingdoms which eventually became one kingdom. The Pharaoh of the whole of Egypt wore a double crown made up of the white crown of Upper Egypt and the red crown of Lower Egypt.  The Pharaoh also carried a crook to symbolise him looking after the people and a flail symbolising the fertile lands.

We made our own dressing up costumes and became Pharaohs.  The white part of the crown is paper mache and the red part is card. The crook and flail are made from mache covered newspaper rolls with egg boxes. The clothes are old curtains from our dress up box.


Later we added make up too!


Hair Cut


We recently picked up these grass heads from the garden centre. The grass has been growing for a while now so the children decided to give them a hair cut!


Friday, 13 January 2012

Picasso Cubism Mixed Media Art


We have been working for several days on these Picasso inspired cubism art works. We discovered that Picasso liked to represent guitars in many of his paintings so we set up a still life with our toy guitar.


Still life

First we used a ruler to divide the canvas up into sections. Then we drew in the still life. Each time we crossed into another section we "went a bit crazy" and distorted the image a bit by displacing the line.


Still life by L

Still life by R

The pencil lines were getting smudgy and rubbing off so we went over our drawing with permanent markers.


Next we chose some areas to collage using wrapping paper, scrapbook paper and tissue paper. Here's the process.

  • Choose a section to collage and make a tracing of that section and all the shapes it contains. 
  • Turn the tracing face down and scribble over the back of the lines with a soft pencil
  • Choose a coloured paper, lay the tracing face up (scribbles down) on top
  • Use a hard pencil to trace over the shape you want to cut out, the graphite from the scribbles will be transferred to the coloured paper.
  • Cut the shape out
  • Cover the section of the canvas with Mod Podge
  • Lay the coloured piece over the top and then Mod Podge again over the top. 
  • Repeat for other shapes in the section until it is completed. 


L's canvas after applying collage

R's canvas after applying collage

Next we used acrylics to paint the backgrounds of each section.

R works on the background

Next we painted the details with acrylics trying to match the colours to the pieces we had already collaged. Here's the finished result:


Mixed media by R age 5

Mixed media by L aged 3


Saturday, 7 January 2012

Are There 7 Days In A Week?

Are there 7 days in a week? We no, not in this household! With Dad doing shift work, 3 days on and 3 off, our weeks are 6 days long. In the past, with a 4 on 4 off shift our week has been 8 days long. Never in recent memory has our week been 7 days.

That's how we like it. We couldn't imaging a life with only 2 days off. Only being able to go places on weekends when its crowded. No thanks!

However the majority of  the rest of the population have a 7 day week. That's where the problems start. For us a "weekly" routine lasting 6 days would be perfect. However swimming lessons, music lessons, hangouts and more all run to a 7 day week. No matter how hard you try (and believe me I've tried) its impossible to combine these 2 routines perfectly. No wonder we never know what day it is!

So here's the thing. I've planned all I want to cover in this years home education, but I'm still searching for a routine that works and gets everything done. We've been working on "school" for 4 days of the week (this includes weekly external classes), with 1 day for hangouts, 1 for trips and 1 free to do whatever we like. However I feel that there is a bit too much to cram into those 4 days. 5 days would be better but the that's 83% of our 6 day "week" taken up with "school". Too much.

So what's the solution? I don't know but I'm working on it...watch this space.

Thursday, 5 January 2012

Photography With Dad

The children are learning about photography with Daddy. Last week the made a pin hole camera to find out how a camera works.

Using a shoe box to make a pin hole camera

Using the pin hole camera to see an upside-down image of a bottle


This week they learnt how to take a photo with a digital camera and how to upload it to a computer. They cropped their photos and printed them out.

R taken by L

L taken by R

They will be doing more digital photography and image manipulation soon.

First Poem

Today R wrote his first poem. We used this poems website as a guide. I love it!


Sadness

If sadness was a colour, 
It would be dull black, 
As wet as a rain drops on the ground.
If sadness was a taste, 
It would be just like a rotten omelette.
If sadness was a feeling, 
It would be as squishy as a plastic ball.
If sadness was a smell, 
It would be smoky as a steam train.
If sadness was a sound, 
It would be quiet as a breeze.


By R